Thứ Tư, 30 tháng 8, 2006

Getting more Plastered!

More about plaster repair.

I never did have to buy any plaster of paris. My lime putty and sand mixture did the job just fine and since we are never in a hurry at crackhouse central the extended curing time was not a problem. In most cases the patching in was quite dry in 24 hours but there were shrinkage cracks. I'm sure that using fibers in the mix would have reduced this cracking which could be filled with more lime putty and less sand or finer sand by the way.
This wall is all plaster repair except those "fingers" at the top. They are hairline cracks that have been taped with mesh drywall tape and a fine coat of joint compound applied to get the tape to stay on the wall.


I haven't drywalled over the door yet because I need to establish where the wall mounting faucet will go and do a little jimmy rigging to hold it in place or establish some kind of access panel so that I can deal with the burst pipes after the winter freeze! (Since plumbing is truely my greatest constant with this place.)
This wall was my experiment wall with filling shrinkage cracks and smoothing lime plaster. On the other side, where the laundry room is, it looked like this
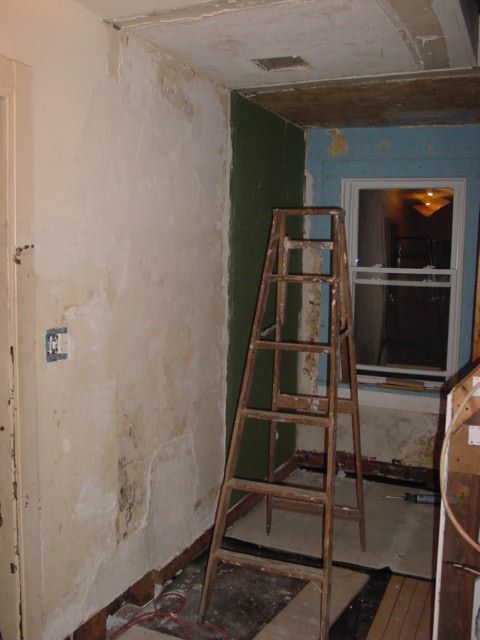


There isn't much room to take a good picture of the patch behind the toilet. It was basically a rectangle of green board. In fact it was almost the right size for the area to be patched and rather than cut the dry wall, it was easier to draw a line on the plaster where the edge of the board would go and chisle a little more plaster away from the brick. I then used my lime plaster to fill around the edges and after it had dried, I taped the edge with joint tape and smoothed the surface with joint compound.


I wasn't so particular about perfect plaster in the laundry room. I left shrinkage cracks to be filled with the joint compound as long as the plaster was firm and holding to the wall. I stated in my first post about plaster work that I wasn't trying to impress anyone with my plastering skills though I am impressing myself with my ability to make the walls smooth without having to sand them!

So, after covering the build out and partition wall with drywall and applying two coats of joint compound to the walls and ceiling in some areas, putting in a second ceiling light, moving the location of the original light, installing a switch and GFCI socket and cutting some old wood to use as baseboards, the laundry/powder room looks like this.


Now all I have to do is strip paint from the molding before applying a few more passes with jount compound in some areas and a final pass over the entire room with "Top Coat", put in some baseboards, install some electrical outlets to service the washer and dryer, tile the floor, finish the plumbing to the sink and this room will be ready to paint! For some people living in Chicago, I would like to say that at 8' X 16' this is the smallest room in the house. No, I'm sorry, Elizabeth's closet room, adjoining her bedroom is the smallest room at 5' X 8'. We'll never be able to live in a small house after this place!

Thứ Ba, 29 tháng 8, 2006

Scratch 'n' Sniff Paint Removal

I've been stripping paint in the laundry room. If you have ever used a heat gun to strip paint from wood then you know that there are some odors that reveal themselves to you. The first is that of hot sticky lead based paint. Sometimes, if you work the same area a little longer you will reveal the odor of pine sap. We often get this and then we realize that no one has smelled this particular scent from this wood for 160 years. When I stripped the little built in cabinet in the breakfast room it revealed the smell of soap. It still smells like soap even after being repainted. Then there is always the surprise I get every few years when I strip corner baseboard molding in the house. Ewwww! The smell of wet dog. Some odors are best locked in. Of course if I really wanted to get rid of it I would just set the heat dial on 10 and soon I will smell the odor of burnt wood!

Thứ Năm, 24 tháng 8, 2006

All Quiet on the Western Front

I've been busy this week with more neighborhood stuff. Besides the yard sale (previous post) I have an alley sweep to pull off this weekend and a monthly newsletter to write. I have actually finished the plaster work and have started smoothing the walls in the laundry room. I will finish my post on plaster repair when I come up for air!
In the meantime, here is another history lesson. At one time Ohio was the western frontier, the "Wild West" with all it's colorful characters including Blue Jacket. Enjoy the story!

Thứ Ba, 22 tháng 8, 2006

Yard Sale Event

Did you ever want a reason to come to wonderful sunny Dayton, Ohio? Well now you can have one! We have been planning a neighborhood yard sale event for a few months now and it is just three weeks away.
We have never tried anything this bold before. The neighborhood boundries are quite extensive if you were to try a walking tour. Our original plan was to encourage a few people in a portion of the neighborhood to have yard sales but not exclude the other sectors. The concept we came up with was simple.Anyone can have a yard sale but if you want to benefit from the Association's promotion of the event and be listed on the "Official" map that we print and distribute then it will cost you $5.00. The money being used to offset the cost of printing and advertising.
We are still putting things together and there are still a few weeks left for people to decide whether or not to participate but I think we are doing quite well. Take a look for yourself. I update this map every few days as more people commit to the event so you need to check back if you want to make the trip or plan on coming! There are more than 40 locations as of today!

I won't be able to do any shopping though, I will be at the information booth.......

Thứ Tư, 16 tháng 8, 2006

Don't be a Slacker!

Be a Shellacker!

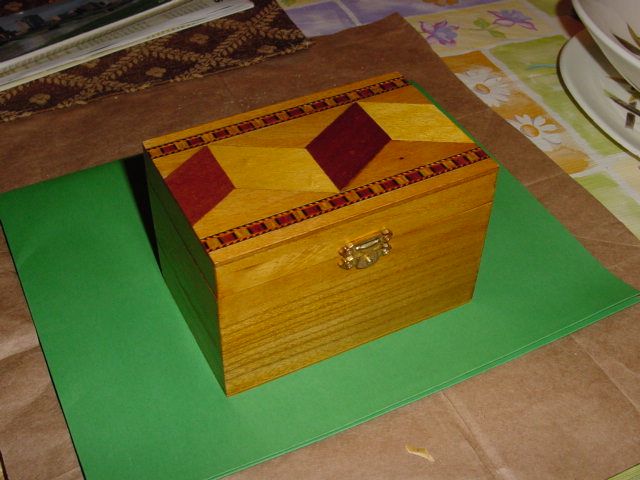
Ever wanted to test your shellacking skills but were afraid to try? Here is your chance. They have unfinished wooden boxes at the "Dollar Tree." They are cute little things that are perfect for painting or finishing and they only cost...... you guessed it! $1.00 plus tax!

Apply four coats of Shellac with light sanding between coats and finish with some wax polish and super fine steel wool and "voila!"


The perfect little box to put Christmas gifts in. I wonder how many of these I could do with a quart of shellac? Now don't go out and spend $20 on shellac and alcohol to finish a lousy $1 box, go do something useful like refinish a floor or something!

Thứ Ba, 15 tháng 8, 2006

Heading Towards the Light.

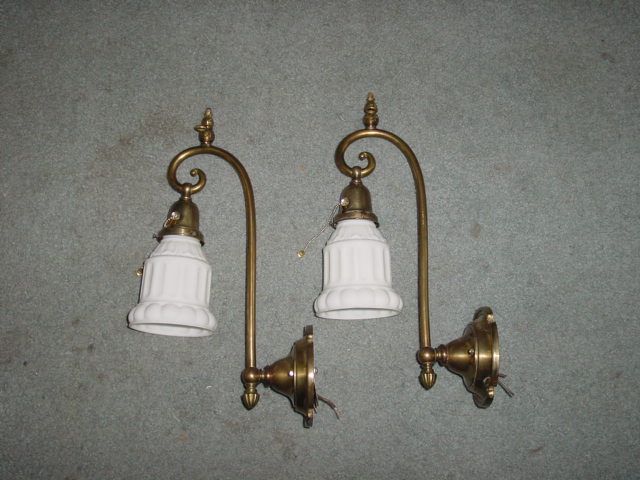
I picked up our lights from the soon to be demolished building on Sunday. I was wrong about when the place was built. It is on the 1897 Sanborn Fire Insurance maps. The owner said that they found 1895 newspapers when they put in insulation and that it was converted into the family business in the 1920s and has remained much the same way since then. So I expect that the front door is original though it must have been moved and the bay window installed. I expect that the staircase is an original one and the bathroom has remained fairly untouched. Which brings me back to the topic of the wall lights. These were in the bathroom and are original gas and electric combination fixtures.


They were a real bugger to rewire. There is a fine tube soldered inside the looped brass tube that you see. This feeds gas to the tap at the top. Most of the joints are soldered so there is no way to dismantle these fixtures. Getting the old wires out was the hardest part, followed by figuring a way to get new wires installed after my string broke (that I pulled through as I removed the old wires). Everything wants to get trapped at that gas valve where the U-bend is. Anyway, after an hour of phiddle phucking around I figured a way to get new wire installed along with new chain-pull sockets and the actual time taken to rewire each lamp was about ten minutes. Of course it took another hour to get the old wire out of the second lamp and I even had to leave one of the wires in place because it kept breaking as I pulled it with the needle nose pliers! The secret was to use a piece of very thin piano wire as a feed to pull the new wire through.

Remember when I said "All reasonable offers considered?" The offer on these was $75.00 for the pair. Which was fair in my opinion. The material cost to rewire and replace the sockets was under $9.00. Making them $42.00 a piece. Replacement shades like the ones attached to the fixtures would cost about $32.00 plus shipping so I'm happy.

Now I just have to rewire the entire bathroom once again just to accomodate the light fixtures!

Chủ Nhật, 13 tháng 8, 2006