Thứ Tư, 31 tháng 5, 2006

More Auction Madness!

We spent another Sunday at Woods Auction this weekend. Deborah spent lots of money this time. We got a bunch of stuff for the house so we can't complain. The prices were better than fair. We feel that we did very well with our acquisitions.
First off, Deborah always wanted an Empire chest of drawers. We got this monster for $160.00.


The 4 foot level shows the scale. This thing is huge! It must weigh near 200 lbs without the drawers.We didn't realize how big it was until we put it in the bedroom. A neighbor helped me carry it up the stairs and we almost lost it near the top. We put a good ding in my finished door frame but considering that it almost went over the banister rail, that is an acceptable price to pay.

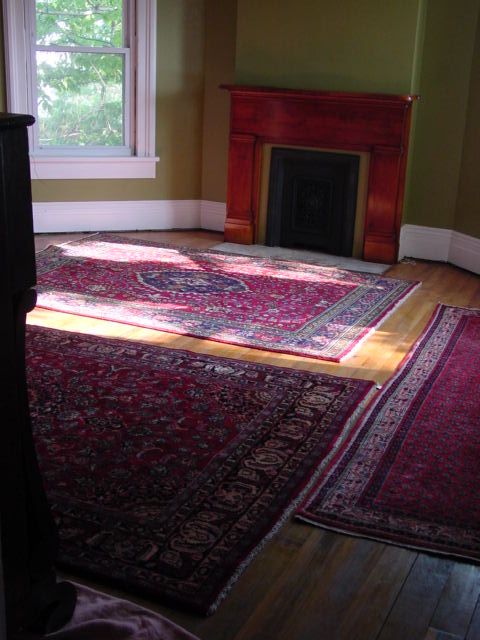
I took Elizabeth outside because she wanted to run around. After some 10 sprints across a field to a tree we went back in and found that Deborah had bought 5 Persian rugs. The largest one was 11' X 9' and cost the most at $275.00. These were wool/cotton rugs made in Iran. Worth alot more than what we were paying. Here is a picture with the 3 smallest ones laid out in the bedroom. The largest 2 are rolled up in the living room and covered with plastic until I am done with sanding the floor.


I actually spent $40.00 and bought this 4 pc. Eastlake parlor set that needs to be re-upholstered. That is a good rainy day project for the future.


We couldn't keep Elizabeth still until we bought her this metal pig (picture taken later at home).


After that she sat quietly on it for the rest of the auction with a huge smile on her face. I have since mounted it on a plywood board with a piece of galvanised pipe like a carousel animal. I would like to find a spring to mount it on for her. Probably the best $45.00 we spent!

There were a few other things we got but by far the best thing was this Victorian hanging library lamp which will go in the parlor.


It is all original but has been wired for electric. Which is fine by me. After I got it home, cleaned all the dust off of it and oiled the pull down chain mechanism I saw the B & H and what appears to be an 1860s patent date on the mechanism. (I will have to check that out some day.) This would indicate that it is a Bradley and Hubbard lamp. That makes it more valuable because it authenticates it's age. A reproduction lamp like this will cost some $400.00. We got it for less! This is probably a $1000.00 lamp. It won't be installed for a while though. We have to get the walls and ceiling painted first. We have been looking at these for 5 years and quite expected to pay at least $700 for one if we wanted it bad enough. Never thought we would get a Bradley and Hubbard though! We now have most of the lighting purchased for the Crackhouse. Most of it was bought at flea markets and auctions.

Thứ Ba, 30 tháng 5, 2006

So You Want to Sand Your Floors?

Do you want to sand your floors but don't know what to do? Well here is what you need to know but were unwilling to ask! This task is not for the whimpy ones who are afraid to get blisters, sore knees or aching backs. Girly men should pay real men (or women) if this is the case but consider this; the last time I looked into getting a floor sanded (1998) it was $800 just to sand the floor. No stain or varnish! I have no idea what it would cost now. The material cost to sand a floor with a rental would be around $250 assuming you keep the equipment for two days and use a floor sander, an edger and you buy the sandpaper from the rental company. You could cut the time to one day but you will have to do good preparation.

First, you should consider stripping any molding smoothing any walls and at least getting the walls painted with primer BEFORE you sand the floors because it would be such a shame to ruin the floors after you spent so much time making them look good. Anything falling on the floor or paint spills will be sanded out so make the mess before sanding.

Pull out any nails or carpet tacks that you can and those that won't come out need to be sunk below the surface of the wood with a hammer and nail punch. Nails will rip through sand paper and can damage the pad of your sanding machine.

If your floors are painted or covered in glue or shellac you should consider trying to strip much of stuff off with a heat gun. This will take many hours to do. The other option is to sand the stuff off but it will gum up the sandpaper and you will spend as many hours stripping off more depth of wood than necessary and changing paper. Preparation is really the key to good looking wood floors.

There are three types of sanders. For refinishing an existing decent floor that has a few scratches you want one of those giant flat palm sanders they rent at Lowes or Home Depot. You can't do too much damage with one of these but you can't get a smooth level floor either if the boards are curved or warped.
There are rotary or disc sanders. I have never seen one but some of them double up as floor polishers. These sand with a circular motion and are a little more aggressive. Edgers are rotary sanders. I have never used a disc floor sander, only an edger and an angle grinder.
The most aggressive are drum sanders. This is a giant belt sander. You have to keep moving with one of these otherwise it will gauge your floor.

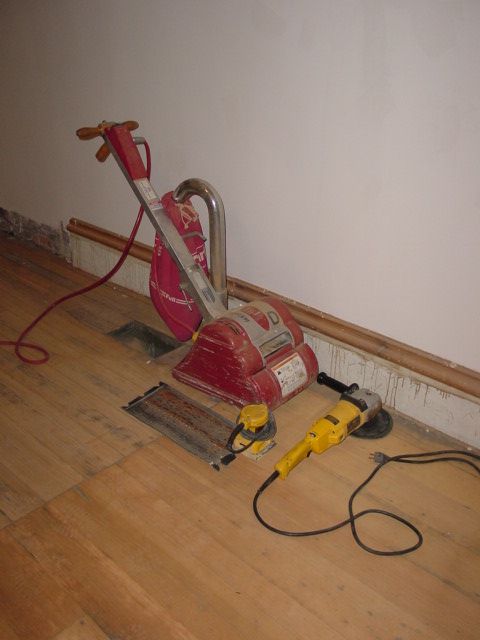
If you have more than one floor to sand and don't want to worry about pulling all-nighters to get the job done so you can return the rental equipment then you should seriously consider buying a used floor sander. We did that. The drum sander cost $650 from a rental shop. Paper for it can be bought online in packs of ten averaging around $1.50 a sheet for the coarse paper and $.95 for the fine papers. We can always sell the sander when we are done and get our money back. I also have a variable speed grinder/polisher that I bought to polish my concrete counters. I use it instead of an edger. I cut 7 inch discs from the spent drum sander paper to maximise my use of the paper and save money. I also use a palm sander for some of those hard to sand spots. Here is a picture of my arsenal.


Here is a floor that I am currently working on. The left side has had a single pass with 36 grit paper.
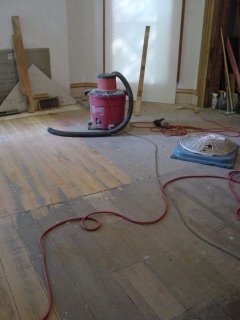


The grit size or # indicates how many "grits" there are per square inch. The higher the # the finer the paper. This floor is mostly unfinished and requires a #36, #60 and a #100 respectfully. You shouldn't need anything finer than a #100 or #120 grit for your final pass.

You should sand with the grain of the wood but you may want to make a couple of diagonal first passes if the floor is really rough or uneven. The diagonal passes cut the wood more and make levelling a much quicker process.

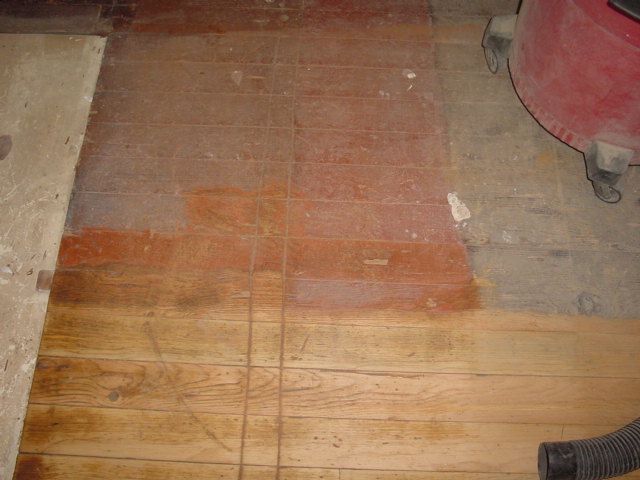
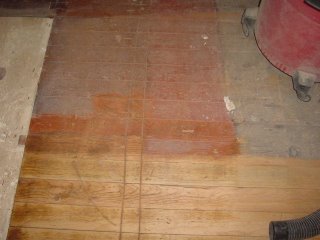
One end of this floor has shellac or some kind of lac paint on it. It was common to put shellac down arond the edges of area rugs. This makes sanding a messy process because it gums up the sandpaper. When this happens I get out the heat gun and start scraping. The stuff has to come off the floor and will either come off with the scraper or on the paper as a result of heat friction. Either way, the volume of goop is the same and the time taken to remove the stuff is about the same if you count the time it takes to change the sandpaper or scrape it off the sandpaper after it has cooled and hardened. In this particular case, I used the variable speed grinder to sand the remaining shellac after using the heat gun. The stuff is removed quicker if you actually allow the disc to gum up because the stuff on the floor is lifted off by sticking to the hot gooey stuff on the rotating disc. When most of the shellac was removed, I then went back to using the drum sander to do the job properly and thus reduced the amount of clogging on the drum sandpaper. Here is a picture of the problem area. The upper part is the shellac covered portion. The lower part has been sanded with both the grinder and then the drum sander with #36 grit paper.


If you are using rental equipment, this kind of unforeseen hang-up will slow you down and cause much stress. The frustration could add a day to your project or make you want to pack it in altogether and put down carpet.

Once you get passed the initial removal of crud and move on to the medium and fine sandpapers it gets much easier. When using a drum sander you can lift the handle, pushing the machine into the floor to apply pressure to hard to sand patches. You can also walk very slowly almost pulling back on the machine which wants to move forward. You must keep moving though and when you get to the edge of the floor you must push down on the handle to lift the drum off the floor otherwise you will get a ridge forming along the edges of the room that will have to be sanded out with the edger or grinder. I should have this floor done in a couple of hours on Thursday now that I have scraped up the shellac and have most of that portion finished with the grinder already.

Other tips;
If you have a window fan, use it. It will get much of the finest dust out of the air and stop it from settling in your house. If all else fails, there is always laminate flooring or wall to wall carpet....

After you have done a couple of floors this process won't phase you one bit. This is my 9th floor so I get quite bored with it any more. I figured it was time to divulge the information and "spread the love" so all you folks who haven't done this yet can get down and dirty and feel my pain!

Thứ Sáu, 26 tháng 5, 2006

Thứ Tư, 24 tháng 5, 2006

I Did Not Know This Either!

We stopped at the infamous "Home Depot" on Monday evening to buy their top of the line Paloma tankless water heater (12 months same as cash AND a $300 tax credit) and enough beadboard to seal the balcony ceiling (hopefully) from any more invasive pigeons!
While wandering around I picked up the "Hampton Bay" ceiling fan catalogue because we need a flush mount outdoor ceiling fan for the aforementioned balcony. Upon reviewing it, I saw THIS!
What is it? A ceiling fan with a built in heater. Neat concept. We have a room on the 2nd floor that might just get one of these in about 2 years when they expand the line and the price drops a bit! At least when they expand the line because this one is a little too modern for our taste!

Thứ Ba, 23 tháng 5, 2006

I Did Not Know That!

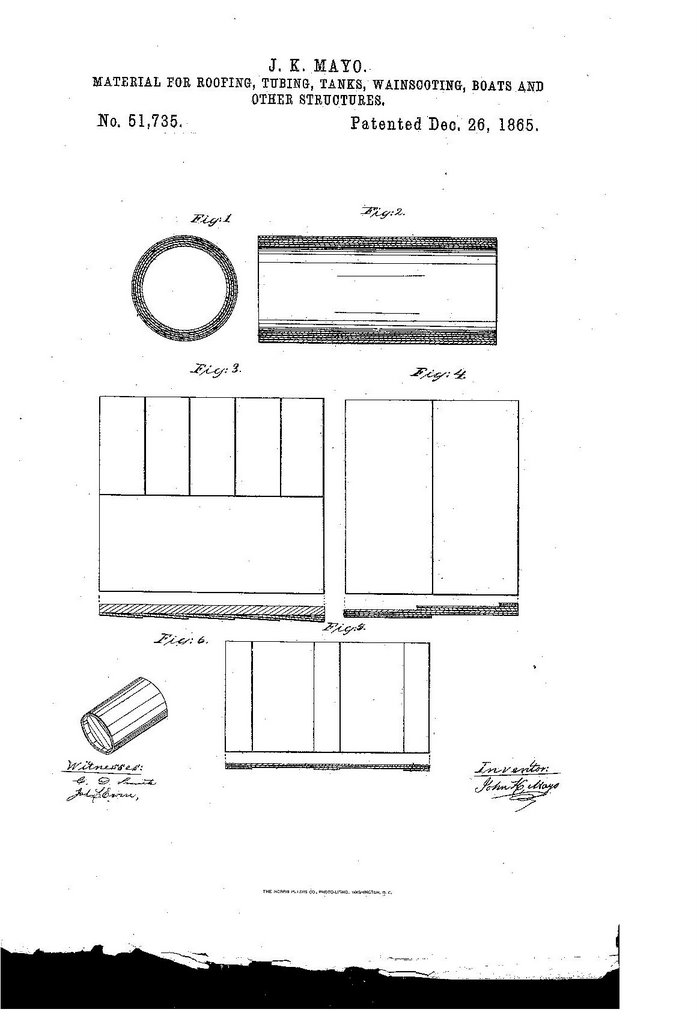
If you have received your latest copy of "This Old House Magazine" then you already know this because it was featured as their trivia question. I was surprised to learn that plywood was invented by the ancient Egyptians and patented in the United States in 1865.
Here are the papers to prove it!


It wasn't until 1934 when waterproof adhesives were developed that the invention really took off. I know that plywood began to appear in furniture in the 1930s. Much of the depression era and waterfall styles of the 30s were constructed from plywood. So I was amazed to see that the stuff was around 70 years before. Who'd-a-thunk-it? Maybe I should show this to people on the Landmark Commission.........

Thứ Tư, 17 tháng 5, 2006

Ask and You Shall Receive!

I have been asked for an update on the progress at the "Old Crackhouse". This was not the first request. Some people don't have the computer skills to spend two hours going through 1 year of "Blog" entries and the "Website" documenting the 5 years of progress on this place. I have been asked to do a summary to make quick viewing of the rooms we have done work on. So, before I give you the link, know this;

This place effectively has 11 rooms. They consist of 2 living rooms, 2 dining rooms, 1 parlor, 1 kitchen, 1 huge bathroom and 4 bedrooms. There is also a large entry hall or "vestibule", two powder rooms, a laundry room, Elizabeth's closet room, the entire third floor which will have a kitchen, bathroom, living room and studio/ work room and there are 5 rooms in the basement that will become 4 rooms when I remove a beadboard partition.

Besides replacing the shingle roof I have completely rewired the place and re-plumbed it. The first floor of the main house is almost finished. I hope to have the parlor primed and the floor sanded this month. This is the last room on the first floor to have the floor finished.
Once done, I have to work on getting a toilet installed on the first floor, getting a laundry room functional on the second floor of the "cottage side", a tankless hot water heater put in the basement and a 90% efficient furnace put in the basement and several of the chimneys lined so that we have some heat if we move in.

Once in, I have the second floor of the "cottage" side to work on and the entire third floor which will require a whole different heating system. Then there is the porch and balcony as well as the front porch and the rebuilding of the small side porch. I have to replace the box gutters and put slate on the mansard part of the roof. Then there is the basement and the garden as well as the garage I have to build..... so this adventure will continue for another two or three years! Sorry, but I have always said it was an ambitious first project! I will say it is certainly alot of work for one person to do (or at least 90% was done by one person) but think of all the money I saved AND some people pay others a whole lot of money to learn the skills that I now have!
The thing that amazes me more than anything else is that I haven't given up yet!

So, for the Quick Tour, go HERE and follow the quick tour links!

Thứ Hai, 15 tháng 5, 2006

Everything you needed to know about Plaster

Now that I know that plaster is basically slaked lime, gypsum and sand, and that I can repair stucco fairly rapidly, I have been doing some research because eventually I would like to finish some of the rooms in the basement. I read somewhere that basement walls in old houses were plastered to stop moisture from passing up to the upper floors. Lime plaster absorbs moisture it seems.

Today I was applying a 3rd coat of joint compound on my parlor walls to smooth them so that I can finish them up later in the week with a thin application of "topcoat". While I was doing this I got to pondering on the ingredients of the stuff. Well, HERE they are in case you just had to know.
Then I found THIS information. If you are hell bent on destroying plaster walls because they are cracked, you should read it. Then there is THIS site to read for additional information.

I do what is practical since I always find that there are several ways to do the same thing.

I have noticed that the longer it takes to get this place fixed up the better I get at doing it though!