I used to be a stain and polyurethane man. Not necessarily by choice, more the result of limited knowledge. Most people and places promote stain and urethane because it is relatively easy to comprehend and polyurethane is the wonder finish of the last 30 years. Durable and long lasting. Now I'm a shellac kind of guy, warm and glowing, not partial to standing water and more vulnerable to daily wear and tear. However, with just a little alcohol I'm easy to restore to my glowing self!
If you asked me about shellac three years ago I couldn't tell you much. I grew interested in the stuff after reading books on decorative finishes. Shellac was mentioned a few times as a wood sealer and was used to give objects an aged plaster look which interested me since we planned on using ceiling medallions in the "Crackhouse". My first encounter with shellac was actually around 1997 when I stripped some woodwork and a floor. I couldn't figure out what the gooey brown stuff was that was clinging to my scraper, why there was so much of it and why it smelled so bad when it burned. After it was all removed and the woodwork and floor refinished with stain and polyurethane I didn't think about it any more. Then we bought the "Crackhouse" which we affectionately refer to as "House II" or "The Mansion".
We had no plans to restore the painted woodwork in the place. There was too much of it and we didn't know what it looked like originally. We did plan on sanding the floors though. Then I was able to acquire a copy of a journal written in 1936 about the family that lived here and it contained some descriptions of the house. As we tore out the masonite panelling and removed partitions that were built to render the building useful as apartments we began to expose woodwork and wallpaper that had been concealed for 50 years.
This is when I started to discover what shellac actually was. My first encounter with the stuff where I knew what I was dealing with was when I cleaned a slate fireplace mantle with alcohol and the red finish came off. Shellac on slate? Hmmm, there something I wouldn't have thought of. Someone gave me a red colored porcelain door knob and I cleaned it with alcohol. The red came off and it was in fact a white door knob. Hmmm, shellac on a door knob? I used alcohol on some original dark woodwork and the dark finish came off leaving unstained wood. Hmmm, the shellac is tinted, not the wood? The real clincher came when I started to strip some wood of paint. In some areas the top layers of paint came off revealing the "original" wood finish. The only problem was the "original" finish was painted on. There was a red colored translucent glossy finish over a pale green paint that was on top of a beige. When rubbed with alcohol the red finish came off. Whodathunkit? Shellac over paint? So now I was intrigued and soaked up every tidbit of information that I could about shellac. I will tell you what I found out in the next exciting episode. Stay tuned to this blog!
Thứ Năm, 26 tháng 10, 2006

Thứ Ba, 24 tháng 10, 2006
Alterior motives!
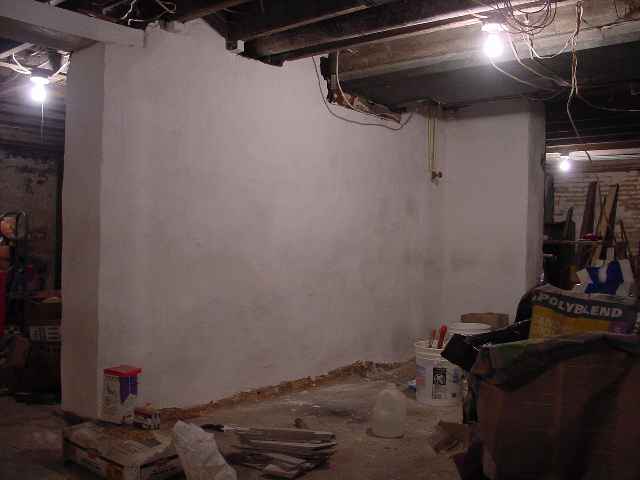
There was a real reason that I started repairing walls in the basement. Actually there are several. One being that I bought 3 bags of lime a few weeks back and need to slake them or use them up within 6 months. I have now used up one bag and slaked another leaving just one bag to occupy space on the kitchen floor. The second reason was to see if the walls were easily repaired because I need to install the tankless water heater and it would be easier to repair the wall BEFORE installing the heater than after. So here are two more basement pictures. The previously repaired long wall section after a coat of whitewash. Drum roll please.........

And the wall that the water heater gets mounted to.
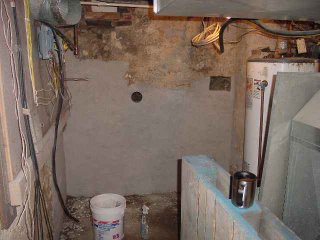
This is a limestone exterior wall and it doesn't suck the moisture out of the plaster like the brick. So drying time is much longer on this wall. Especially with cold temperatures. It has a large opening on the upper left side where a window was inserted to make effective use of a hole made in the wall for the chimney of a coal furnace. This hole is why the water heater will go here, so that it can be readily vented. Ultimately I will have to move the water heater to another location about 15 feet further down the same wall. I can't do this until after the fire escape in the back of the property is removed though and an old window opening becomes accessable for venting. It currently has a slab of concrete in front of it making the ground surface too high for the vent to achieve 12 inches of clearance from the ground. If I leave the water heater in the initial location it won't pass inspection due to the fact that the vent opening is within 4 feet of one of the dining room windows that we will probably never open. If any building inspectors are reading this, my compromise is to put blocks or wedges on the sash channels so the window can't be opened. We also plan to build a deck off the back of the house so the water heater will have to be moved because we can't vent it in that location with a deck. It seems like many things around here, I have to do a job to have the necessities then re-do the job after removing the object that prevents me from doing the job right the first time.
As you can see in the photo there were two holes in this wall. I suspect they were used for hiding the "stash" when druggies lived here. I have kept the holes but tidied them up considerably. The round hole has a piece of pipe in it and I suspect it was a water line to the back yard or the old outdoor laundry. I have kept the opening in case we need to run a new line to the well area outside. The larger hole may have been made to run a water or gas line but no pipe is present. My arm extends about 2 feet into this void. I don't know what to do with it. My thought was to make a lockable door behind which I can stash my jester hats and that very small cask of Amontillado that you readers feel that I should buy!
And the wall that the water heater gets mounted to.

This is a limestone exterior wall and it doesn't suck the moisture out of the plaster like the brick. So drying time is much longer on this wall. Especially with cold temperatures. It has a large opening on the upper left side where a window was inserted to make effective use of a hole made in the wall for the chimney of a coal furnace. This hole is why the water heater will go here, so that it can be readily vented. Ultimately I will have to move the water heater to another location about 15 feet further down the same wall. I can't do this until after the fire escape in the back of the property is removed though and an old window opening becomes accessable for venting. It currently has a slab of concrete in front of it making the ground surface too high for the vent to achieve 12 inches of clearance from the ground. If I leave the water heater in the initial location it won't pass inspection due to the fact that the vent opening is within 4 feet of one of the dining room windows that we will probably never open. If any building inspectors are reading this, my compromise is to put blocks or wedges on the sash channels so the window can't be opened. We also plan to build a deck off the back of the house so the water heater will have to be moved because we can't vent it in that location with a deck. It seems like many things around here, I have to do a job to have the necessities then re-do the job after removing the object that prevents me from doing the job right the first time.
As you can see in the photo there were two holes in this wall. I suspect they were used for hiding the "stash" when druggies lived here. I have kept the holes but tidied them up considerably. The round hole has a piece of pipe in it and I suspect it was a water line to the back yard or the old outdoor laundry. I have kept the opening in case we need to run a new line to the well area outside. The larger hole may have been made to run a water or gas line but no pipe is present. My arm extends about 2 feet into this void. I don't know what to do with it. My thought was to make a lockable door behind which I can stash my jester hats and that very small cask of Amontillado that you readers feel that I should buy!
Thứ Bảy, 21 tháng 10, 2006
I fixed the search feature!
The title says it all. Now you don't have to use Google to find my posts about raccoon poop!
Speaking of little poops....

Speaking of little poops....

Thứ Sáu, 20 tháng 10, 2006
Trying Something New
I'm adding a search feature to this site in an effort to assist with the "Great Shellac Narrative" that will be posted soon. At this very moment, it doesn't seem to be working properly but if you click the word HELP and enter your search word(s) it will do its magic for you. I may have to set up its own page to get it to work properly but it is almost 2 AM and I turned into a pumpkin 2 hours ago! I hope I get it to work because it will save me alot of aggravation. I've also corrected my links to Fixer Upper and Old Man and the Street in the side bar and added a new Dayton site for all you folks wanting to visit our great town!
I checked my plaster today and it hasn't cracked. The trick was using the polypropelene fibers in the mix! The fibers are left over from my concrete countertop extravaganza and were bought at a concrete supplier here in Dayton. So you don't HAVE to use animal hair people! I whitewashed that long wall too while I was at it and now all I have to do is install the 100 plus hamster wheels and purchase the hamsters and we can have heat this winter!
I checked my plaster today and it hasn't cracked. The trick was using the polypropelene fibers in the mix! The fibers are left over from my concrete countertop extravaganza and were bought at a concrete supplier here in Dayton. So you don't HAVE to use animal hair people! I whitewashed that long wall too while I was at it and now all I have to do is install the 100 plus hamster wheels and purchase the hamsters and we can have heat this winter!
Thứ Năm, 19 tháng 10, 2006
COMING SOON!
Everything you ever wanted to know about shellac and possibly a few things you didn't! How to use it, how not to use it, how to get it off your hands when you spill it, how to get it off the floor when you spill it, why you shouldn't blow down a tube of aniline dye in an effort to filter it faster (now that IS a funny story) so you can add it to your shellac and of course the thing you all want to know, does shellac improve your sex life?
John over at the Devil Queen has requested a post about shellac before he embarks on that journey into the downward spiral of alcohol use. Who am I not to play the role of "Candyman"? Anyway, when I get all my info together and stop rambling about how great my basement is going to look when my daughter is a teenager, I will post a thing or three about something I have come to learn so much about. Despite what they say about denatured alcohol, I'm with Bill Clinton on this one "I did not inhale".
I haven't done this in a while, so if you haven't read my posts from April 2005 and want to know how you keep a houseblog reader in suspense CLICK HERE.
John over at the Devil Queen has requested a post about shellac before he embarks on that journey into the downward spiral of alcohol use. Who am I not to play the role of "Candyman"? Anyway, when I get all my info together and stop rambling about how great my basement is going to look when my daughter is a teenager, I will post a thing or three about something I have come to learn so much about. Despite what they say about denatured alcohol, I'm with Bill Clinton on this one "I did not inhale".
I haven't done this in a while, so if you haven't read my posts from April 2005 and want to know how you keep a houseblog reader in suspense CLICK HERE.

Thứ Tư, 18 tháng 10, 2006
The Basement Money Shots!
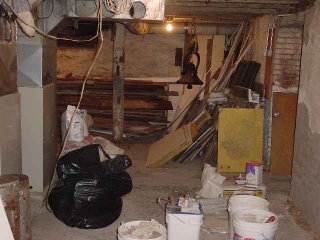
So far the plaster hasn't cracked much, but it is still drying. I'm sure it will crack, especially if it is anything like my plumbing! Anyway, here is the basement in disarray. You can see my piles of organized chaos everywhere.

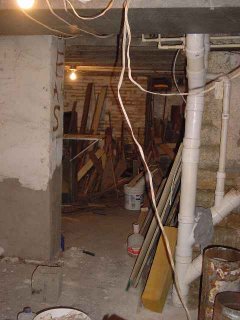
Here are the walls that I have been putzing over. The long section of repaired plaster.
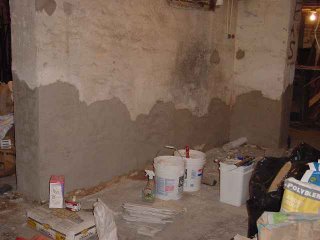
The corner that has been repaired and whitewashed.

When the lower section drys out it should be as white as the top section. One day I will repair all the basement walls and whitewash them. It will look like some medieval dungeon or an old wine cellar down there when done. Should be great for Halloween parties for Elizabeth. I'm looking forward to it already!

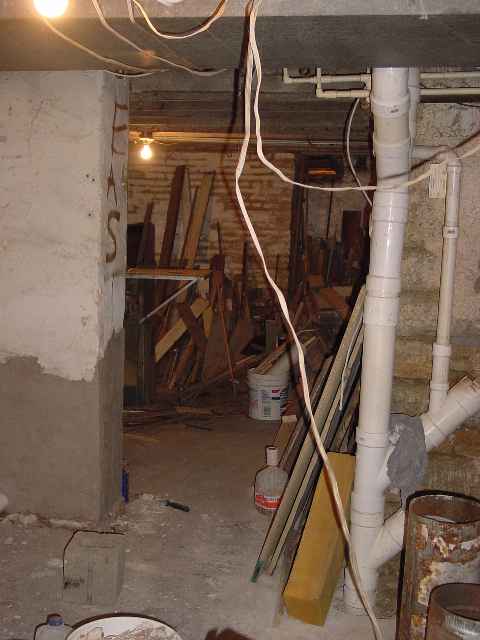
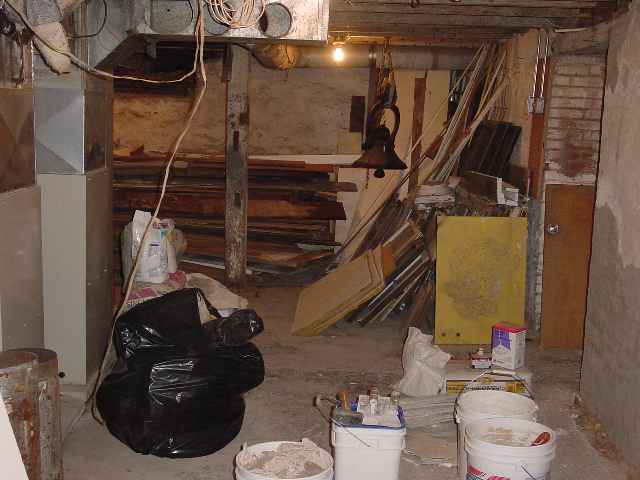
Here are the walls that I have been putzing over. The long section of repaired plaster.
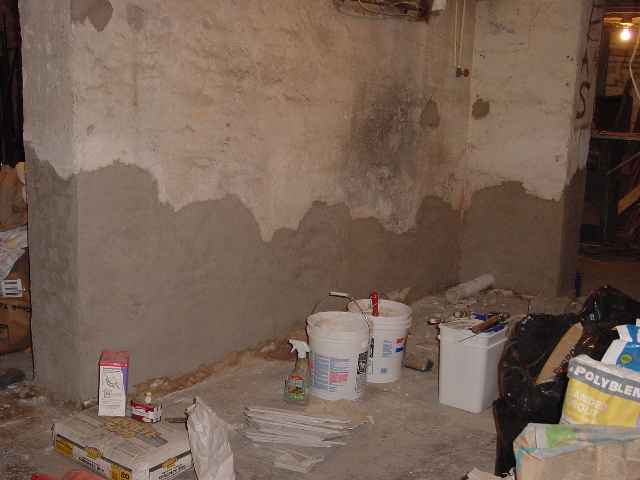
The corner that has been repaired and whitewashed.
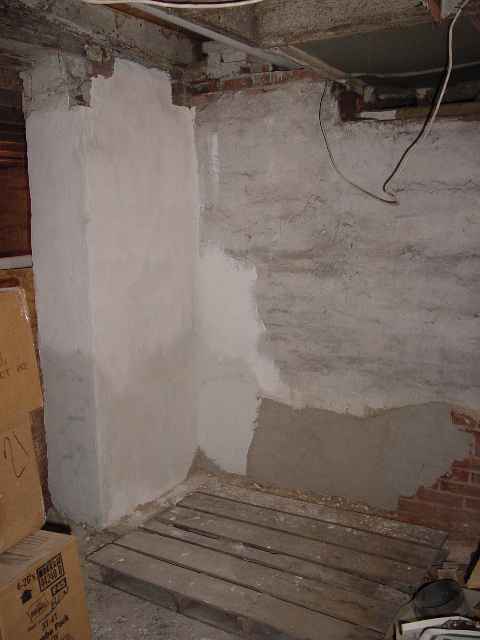
When the lower section drys out it should be as white as the top section. One day I will repair all the basement walls and whitewash them. It will look like some medieval dungeon or an old wine cellar down there when done. Should be great for Halloween parties for Elizabeth. I'm looking forward to it already!
Thứ Ba, 17 tháng 10, 2006
More Plaster Stories
If you Google "Chunk of plaster" then this blog appears as one of the links on page 1 of the search. This knowledge has prompted me to describe a little of what I did this week during a putzing moment at the "Crackhouse". A moment that lasted 8 hours but really has a positive psychological effect in my efforts to obtain plastering nirvana and complete oneness with my basement....
My basement looks like CRAP! It consists of 5 rooms and every single one is full of stuff that needs to be organized or thrown out. It also contains my stockpile of wood dating from present to Pre-Cambrian Era which is stacked in two rooms in over-flowing piles of disarray. The outside walls are limestone blocks and most of the plaster has crumbled into a a line of sand and chalk dust on the floor. The inside walls are brick and the lower 2 feet of plaster is missing around every room as a result of either sewage backup in the past or someones dog rubbing along the walls while exiled to the dark, damp recesses of this house.
I decided to "test" my plastering skills for continued credits for my license in Crackhouse Remodelling which is recognized in 30 different countries (in the southern hemeshpere) and one municipality within Ohio that includes a town called Figmentofmyimagination. I mixed up a batch of plaster from one of my tubs of slaked lime and a bucket of sand. I applied this to a section of wetted down exposed brick and it looked 10 times better. After it dried and cracked I applied a thin coat of lime putty and the wall looked 20 times better. After that dried and cracked I applied lime putty to the entire wall with a paint brush and besides being very white, it looked 50 times better. This was done over the course of a few days.
So I decided to fix another wall, but this time I added polypropelene fibers to the plaster batches (in lieu of animal hair) to see if it reduces cracking and plastered a whole stretch of wall in one room. It was at least 15 feet in length. The plaster is just a thin layer over the brick. In some areas it is maybe an eighth of an inch thick. The wall looks 10 times better. Then I went home and read my 1909 book about whitewashing cellar walls. That was yesterday.
I am about to go over there now to do some work. Now that the plaster has dried a bit, I wonder how much better it will look! If it is badly cracked I can always drink a couple of beers. Things always look better with beer!
My basement looks like CRAP! It consists of 5 rooms and every single one is full of stuff that needs to be organized or thrown out. It also contains my stockpile of wood dating from present to Pre-Cambrian Era which is stacked in two rooms in over-flowing piles of disarray. The outside walls are limestone blocks and most of the plaster has crumbled into a a line of sand and chalk dust on the floor. The inside walls are brick and the lower 2 feet of plaster is missing around every room as a result of either sewage backup in the past or someones dog rubbing along the walls while exiled to the dark, damp recesses of this house.
I decided to "test" my plastering skills for continued credits for my license in Crackhouse Remodelling which is recognized in 30 different countries (in the southern hemeshpere) and one municipality within Ohio that includes a town called Figmentofmyimagination. I mixed up a batch of plaster from one of my tubs of slaked lime and a bucket of sand. I applied this to a section of wetted down exposed brick and it looked 10 times better. After it dried and cracked I applied a thin coat of lime putty and the wall looked 20 times better. After that dried and cracked I applied lime putty to the entire wall with a paint brush and besides being very white, it looked 50 times better. This was done over the course of a few days.
So I decided to fix another wall, but this time I added polypropelene fibers to the plaster batches (in lieu of animal hair) to see if it reduces cracking and plastered a whole stretch of wall in one room. It was at least 15 feet in length. The plaster is just a thin layer over the brick. In some areas it is maybe an eighth of an inch thick. The wall looks 10 times better. Then I went home and read my 1909 book about whitewashing cellar walls. That was yesterday.
I am about to go over there now to do some work. Now that the plaster has dried a bit, I wonder how much better it will look! If it is badly cracked I can always drink a couple of beers. Things always look better with beer!
Đăng ký:
Bài đăng (Atom)