Chủ Nhật, 15 tháng 10, 2006

A View From the Toilet.

I can honestly say that the first floor powder room is now officially the SMALLEST room in the house! At 6' X 2.5' totalling a whopping 15 sq. ft of floor space I am limited when it comes to sink space and options. I will probably end up making this sink out of concrete since the painted one we have from Mexico can't be used in this room as originally planned due to limited drainage space and faucet space or lack of.

At some time, probably around 1920, the proper door to this room was wallpapered over and a doorway was knocked out of the brick wall separating this room from the dining room and I'm sure the stairs to the basement were added at the same time because the "cottage" side of the house became a rental. It is this doorway that provides me with any room for a sink. The 8 inch thick brick wall has been framed with wood and recycled Masonite panelling which will all get painted some day. The sink will sit in this alcove and extend a few inches into the room. When I am ready to make it then I will post about the process.

I was going to make a pair of cabinet doors to hide the plumbing under the sink but we came up with another idea. Several years ago we bought an iron fireplace cover with the idea that we would use it to cover a fireplace. When I restored the openings to their original size though, the iron cover was too small and its use became obsolete. It was also designed for a gas fire place and ash cleaning would be awkward if we used it since the bottom panel doesn't come off. We paid around $50 for it so the plan was to utilize somewhere else in the house rather than sell it but exactly what to use it for wasn't certain. One suggestion was as a mirror frame. I was getting tired of moving it around from room to room. At least it doesn't weigh as much as the world's heaviest bathtub!

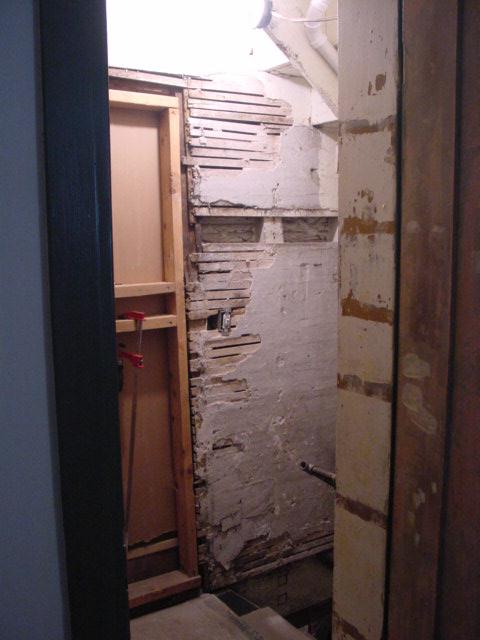
Well we found a use for it now. It will be the cover for the space under this sink and fits quite nicely in the space. The design on it is quite Gothic so the theme for the room has been determined by its use. The middle panel lifts out gaining access to the plumbing under the sink. Of course I also have to find another light fixture to go with this new theme since the old one was art deco and doesn't go with gothic revival at all! I do believe we actually have more light fixtures now than can be used in the house. So, if you could sit on the toilet with the tank removed and lean into the wall behind with your head sideways on your shoulder so it doesn't hit the angled ceiling and take a photograph, this is what you would see.

Thứ Sáu, 13 tháng 10, 2006

Dealing with Rats and Mice - 1909 Style

It has been a while since I looked in my 1909 book of Household Discoveries. I thought I would see how people dealt with rats and mice back then. There are five pages dedicated to the subject! Mostly dealing with rats. Here they are below. Makes for some interesting reading.


Almost makes you want to have rats just so you can get rid of them!

Thứ Ba, 10 tháng 10, 2006

Finishing Some Details

Two years ago I got the floor finished in the cottage side living room.


Since then the only change in this room was putting slate tile in the fireplace. In fact the room is currently used for storage and I hope to get it cleaned out in a few days. Well, during a boredom moment while waiting for joint compound to dry in the powder room, I decided it was time to frame in that pass through from the kitchen and the underlying cabinet. As of yesterday it looked like this.


Then today it looks like this.


Hopefully the final coat of green paint will go on by Thursday night and the doors will be attached. If I'm still bored then I'll add some shelves. The idea all along was to make this a place to stash CDs and cassette tapes. In case you wondered, in the 1840s house this was a window looking onto a back porch. Sometime between 1920 and 1954 it was a doorway. The original doorway was boarded up. After 1954 it was boarded up and the original doorway was used as a book case. I'm sure Elizabeth will think it is a great place to store her collection of horse figures! I should get bored more often......

Chủ Nhật, 8 tháng 10, 2006

We Can Re-build it!

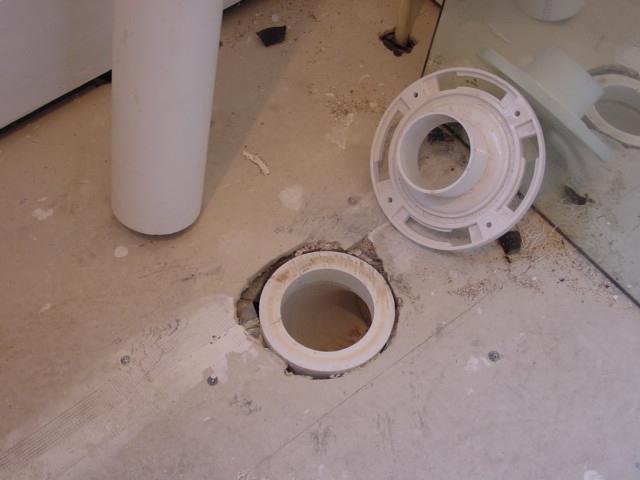
Remember my story about how we hired a plumber 5 years ago, affectionately known as "Placebo the Useless"? Well, after a visit to Lowes I found that there is a PVC flange made for inserting into metal pipe. It has a rubber seal and could be used as a replacement for my flange. Of course it costs 5 times more than a regular flange at around $15. Fortunately, Placebo used a flange that could have been used on either 3" or 4" pipe and I was smart enough to request 4" DWV pipe for our main stack. What does this mean? Well, after laying on the floor for 30 minutes while exercising my wrist with vigorous strokes while my fingers were tightly gripping the handle of a saw (really, some of you have minds in the gutter!), I was able to decapitate the head of my flange! Ouch!


Upon careful examination I realized that I could insert a 3" flange into the opening if I cut a 1" sleeve out of a piece of 3" PVC pipe. Since I had a spare 3" flange laying around, I saved myself $15.

I had some more 'Placebo" issues while laying in the plumbing for the first floor powder room. Mr. Useless had laid in several feet of 4" pipe for the toilet to connect to but it wouldn't pass through the opening in the brick wall because it was not installed at a steep enough angle. I had to cut it back about 2 feet and put in a 3" section to the toilet. The smaller diameter pipe cleared the wall and lined up perfectly for the toilet to sit in the center of the room. I can honestly say that from this point forward, I will no longer be haunted by Placebo's plumbing. I have corrected all of his errors. Any future corrections will be of errors made by me and I didn't have to pay for those ones!

Thứ Năm, 5 tháng 10, 2006

Planning for the future, already!

I have walled in the downstairs powder room. In the process of doing so a decent amount of dead space is being created under the main stairs and behind where the toilet will go. It seems like such a waste of space and I just couldn't let it go to waste completely, so.......


I gathered up a few phone books, some old mail that was laying on the kitchen counter and some old neighborhood newsletters, put them in a plastic bag with a dated note and left them for some future owner to discover some day! I wish someone had done that for me. Instead, I get mummified mice and flattened paint cans to discover!

Thứ Hai, 2 tháng 10, 2006

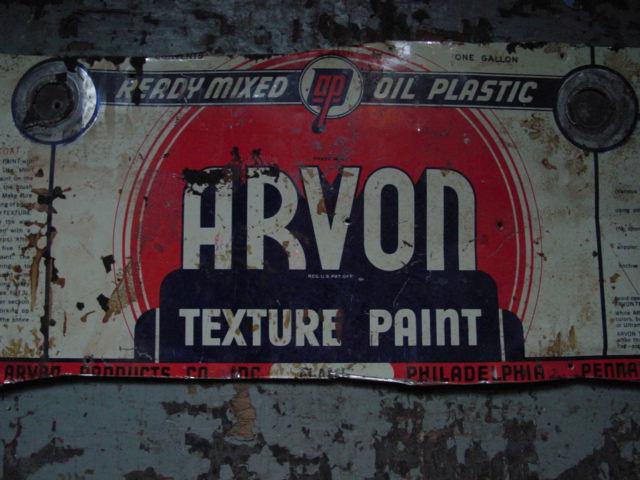
Old Textured Paint

Ages ago when I pulled up the roll type linoleum flooring in one of the cottage side bedrooms I uncovered a strip of tin that was used to level a floor board that had been cut at some time way back when gas lights were installed during the last Ice Age.


I didn't think much about it and the tin sat on the floor, covered by an old sink and several contractor bags of rock wool for the last three years. I cleaned up the room a bit to make room for all the tools and the worlds heaviest bathtub (which will now be in the same room as a flight of stairs and a little closer to going down them.) I have also managed to rid myself of the fifteen bags of raccoon and pigeon poop encrusted rock wool leaving me the original 9 from the kitchen that I still have to sneek into the garbage at the rate of 3 bags a week.
Well, I found the tin once again and read the instructions on how to apply the paint. I noticed that the color was called "FLAME". Interesting name for a color I thought. I wonder what color it could be? Then I turned the can over


I know exactly what room it was used in and could probably guess what year it was applied based on the pieces of old newspapers that were shoved in all the gaps between the wall and the molding to keep out draughts!

Chủ Nhật, 1 tháng 10, 2006

I've Been a Busy Boy!

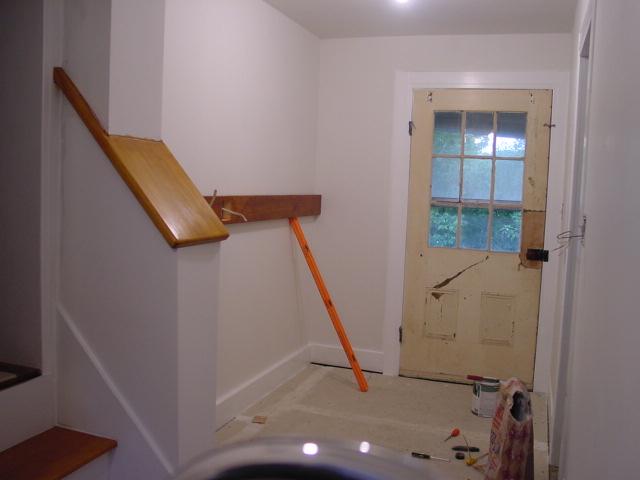
It is amazing what you can do when you don't have a computer to slow you down! I have painted the laundry room with primer and made a base for the sink that we bought at IKEA out of some of the antique wood that I have lying around. Here is a picture of the thing. Three guesses as to what it is finished with! I even used old nails to make it with because I don't have enough modern nails lying around!


I finished a long 2 X 6 board with the same stuff and still have to mount it on the wall behind where the washer and dryer will go. I have cut a channel in the back of it to run my electrical cables because the wall is made of brick.


Yes, the level IS holding the beam up as it hasn't been attached to the wall yet! So now you have seen the laundry room! It still needs the floor done and the walls painted.

Next I went into the dark hole that we call a basement. First through the door


Then down the stairs


To the abyss.


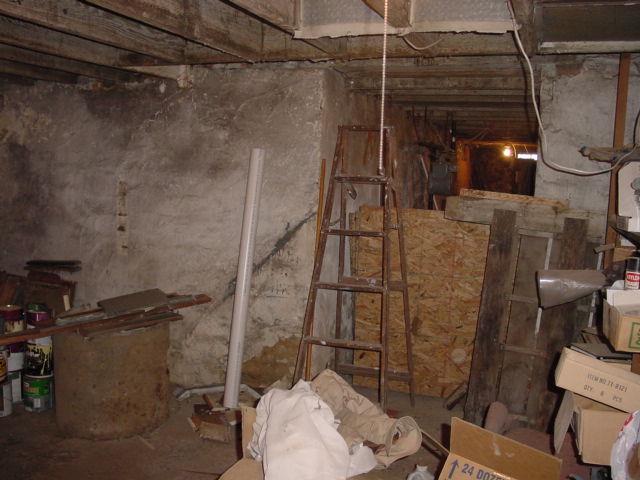
Which looks like this now!


I removed the stairs and have laid in a joist so that I can put in a floor for a small powder room on the first floor. I have to lay in another joist so the floor doesn't bounce but will do that after I have installed the plumbing. It is easier to hang a joist around the new plumbing than to cut the joist to put new plumbing in. The current space between the joists is 26 inches and the toilet will be in the center where the average Joe would put a joist. Since my plumbing skills are above average but give below average results and my wood working skills are below average but give above average results, I need to follow the lesser path of evil which dictates that plumbing will require more attention and time and should be installed first! The new joist can be installed alongside the DWV for the toilet on the side that would be the best to install it after the floor is in place.
This is my next major project before the winter. Getting the powder room ready for painting..

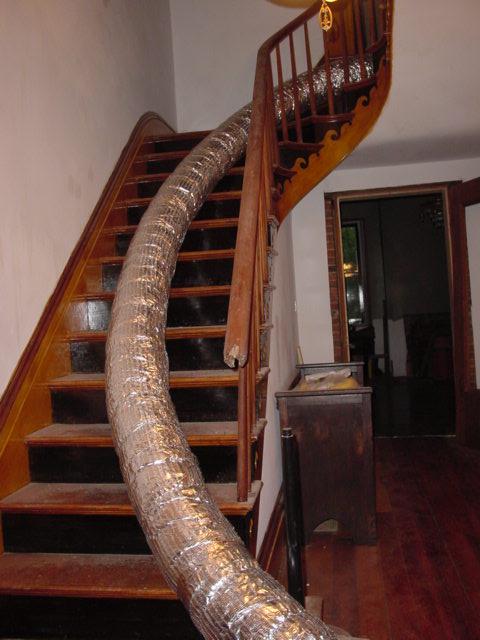
I also attempted to line a chimney with clay tiles but failed early in the attempt so that I don't have to waste any time or money on that and will resort to stainless steel chimney liners. I even got the one stainless steel liner I had ready for another chimney only to find that it will be too wide to pull up the chimney with the insulation blanket. Now I have to haul the thing up to the third floor again and with all the wrapping it weighs about 40 lbs more than it did when I brought it down the stairs. So here is where it sits until help arrives!


Chimney lining will be delayed another six months now because I may as well line all the ones that I need to line at the same time and I don't have all the lining kits or the wads of cash needed to acquire them at this particular moment. I also need a permit for this project and to install the water heater and furnaces that we don't have yet so the delay may be cost effective at this time. Besides, we all know that my plumbing will burst somewhere this winter and installing the water heater (which we do have) will just increase the number of places where this could happen!