OK. Let all see what we can come up with here! I've got a few to start. Feel free to add your own in the comments section! Number 1 is the reason I came up with this....
1) One coat paint - isn't
2) The time taken to complete a project is inversly proportional to the time taken to prepare for the project.
3) You will always find your problem in the least likely location.
4) If your plumbing leaks in one spot, it will leak in an entirely different spot after you have fixed it.
5) User friendly tools - aren't.
Thứ Năm, 27 tháng 10, 2005

Thứ Ba, 25 tháng 10, 2005
Change in plans AGAIN!
I got to spend a couple of hours working on the house on Tuesday. I was able to draw a line around the dining room at 36" above the floor for a chair rail. I then pencilled continuous line around the room at 4" below the ceiling for a picture rail and was only off by 1/4 inch at the end after drawing a level line around 62 feet of wall! I then snapped chalk lines on the ceiling where I thought I wanted the colors to change.
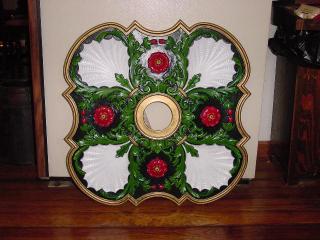
A few days ago I thought that a 6' X 6' square at the center of the ceiling laid in a diamond orientation and bordered by molding would look k-k-kewl! However, after chalking it out I changed my mind. The room is quite large. 16' 3" X 16' 6" in fact. The light is not centrally located in the room due to a fireplace and that is not symmetrical with the centerline of the room either. Standing on the floor looking at the ceiling you notice that the square does not appear to be square due to the way the borders farthest away from you converge. An actual diamond shape would appear better but I think I will end up with an 8' X 8' square with sides parallel to the walls. The other problem is this. Here is the medallion that I painted last year for this ceiling. I want the shells to "point" towards the corners of the room and this thing is around 2' wide.
I will start painting the ceiling and walls today. Here are the colors.

The real color is slightly different than this photo of the color card but you get the idea. The red brown is for the ceiling edge (about 4 feet wide) and the 4" part above the picture rail (this hides the uneveness of the ceiling edges). The drab green is for the upper 6' of the walls and the 8' square ceiling center. These same colors will be used in the living room but the walls and the ceiling will be solid color.
Sorry, the wallpaper isn't here yet so I can't show that just yet.
Stay tuned for "CrackHouse" updates. I'm not just blowing smoke!
A few days ago I thought that a 6' X 6' square at the center of the ceiling laid in a diamond orientation and bordered by molding would look k-k-kewl! However, after chalking it out I changed my mind. The room is quite large. 16' 3" X 16' 6" in fact. The light is not centrally located in the room due to a fireplace and that is not symmetrical with the centerline of the room either. Standing on the floor looking at the ceiling you notice that the square does not appear to be square due to the way the borders farthest away from you converge. An actual diamond shape would appear better but I think I will end up with an 8' X 8' square with sides parallel to the walls. The other problem is this. Here is the medallion that I painted last year for this ceiling. I want the shells to "point" towards the corners of the room and this thing is around 2' wide.

I will start painting the ceiling and walls today. Here are the colors.

The real color is slightly different than this photo of the color card but you get the idea. The red brown is for the ceiling edge (about 4 feet wide) and the 4" part above the picture rail (this hides the uneveness of the ceiling edges). The drab green is for the upper 6' of the walls and the 8' square ceiling center. These same colors will be used in the living room but the walls and the ceiling will be solid color.
Sorry, the wallpaper isn't here yet so I can't show that just yet.
Stay tuned for "CrackHouse" updates. I'm not just blowing smoke!
Thứ Bảy, 22 tháng 10, 2005
ANOTHER change in plans!
Well, the bedroom floors are finished! I spent Saturday on my knees waxing and polishing the boards so they too say "Whoooa" like the rest of the finished flooring, but as I type there are changes afoot! Let me explain;
When we painted the bedroom we decided that the purple shade that we used on three of the walls could be used on the ceilings in the living room and dining room. Dark color on the ceilings would make the rooms more cozy and make the ceilings appear lower. The shade of purple went well with the shade of olive drab we wanted for the walls in the living room. It also complimented the antique light fixtures that we bought for these two rooms. It would look quite "regal".The woodwork in the living room is massive and very tall around the windows and doors. It is also very amber in color from the shellac. The fireplace mantle is dark grey variegated marble. This limits our choice of wall color to earth tones that will compliment the woodwork and the fireplace and look good on 10 foot high walls with almost 10 foot high wood moldings. Whatever color was used in the living room would also be used in the dining room due to the way the rooms join together but only needs to be on the upper part of the walls. Based on the colors of the fireplace mantel, the curtains, the dark floors and the ceiling medallion that I painted for the dining room, we chose olive drab.
Well I have already put one coat of purple on the ceiling in the dining room but haven't put up the medallion yet. Good job too because we have decided to paint the ceilings a different color now. We spent several hours at Home Depot on Thursday afternoon looking at wallpaper for the lower part of the dining room walls below the chair rail that I have to install. We found one that we liked and ordered it. The purple would not compliment the wallpaper though so we picked a color to match the dark burgundy stripe in the wallpaper and bought two gallons. Not so bad, we were going to have to buy two gallons of purple if we were to proceed with that ceiling color. We also bought the olive drab color which will also be used to paint a 7 ft square at the center of the ceiling laid in a diamond and not parallel to the walls. We will use the cheap pre-primed molding to form the border of the square which will be painted a tan color and coated with aniline tinted shellac so that it appears to be walnut. Since this is the "formal dining room" it should look "formal". When it is done it should look quite "classy".
We didn't stop at wallpaper and 4 gallons of paint. Ohhhh noooo, I had to get 6 hardwire smoke alarms, one hardwire CO2 detector, 3 tubes of caulk, 2 door mats and some small marble tiles to use as coasters as well! You know, to exceed the $299 minimum. I love 6 months "same as cash!"
Pictures will follow shortly....
When we painted the bedroom we decided that the purple shade that we used on three of the walls could be used on the ceilings in the living room and dining room. Dark color on the ceilings would make the rooms more cozy and make the ceilings appear lower. The shade of purple went well with the shade of olive drab we wanted for the walls in the living room. It also complimented the antique light fixtures that we bought for these two rooms. It would look quite "regal".The woodwork in the living room is massive and very tall around the windows and doors. It is also very amber in color from the shellac. The fireplace mantle is dark grey variegated marble. This limits our choice of wall color to earth tones that will compliment the woodwork and the fireplace and look good on 10 foot high walls with almost 10 foot high wood moldings. Whatever color was used in the living room would also be used in the dining room due to the way the rooms join together but only needs to be on the upper part of the walls. Based on the colors of the fireplace mantel, the curtains, the dark floors and the ceiling medallion that I painted for the dining room, we chose olive drab.
Well I have already put one coat of purple on the ceiling in the dining room but haven't put up the medallion yet. Good job too because we have decided to paint the ceilings a different color now. We spent several hours at Home Depot on Thursday afternoon looking at wallpaper for the lower part of the dining room walls below the chair rail that I have to install. We found one that we liked and ordered it. The purple would not compliment the wallpaper though so we picked a color to match the dark burgundy stripe in the wallpaper and bought two gallons. Not so bad, we were going to have to buy two gallons of purple if we were to proceed with that ceiling color. We also bought the olive drab color which will also be used to paint a 7 ft square at the center of the ceiling laid in a diamond and not parallel to the walls. We will use the cheap pre-primed molding to form the border of the square which will be painted a tan color and coated with aniline tinted shellac so that it appears to be walnut. Since this is the "formal dining room" it should look "formal". When it is done it should look quite "classy".
We didn't stop at wallpaper and 4 gallons of paint. Ohhhh noooo, I had to get 6 hardwire smoke alarms, one hardwire CO2 detector, 3 tubes of caulk, 2 door mats and some small marble tiles to use as coasters as well! You know, to exceed the $299 minimum. I love 6 months "same as cash!"
Pictures will follow shortly....
Thứ Tư, 19 tháng 10, 2005
Our Primitive Alarm System.
Can you imagine our shock when we first pulled up carpet and masonite panelling that was stapled to the floor to reveal a hardwood floor with long gauges running across the boards? Our first thought was that someone had dragged a refridgerator across the living room where we first saw the gauges. Then we noticed the grooves in the flooring in the dining room, the parlor, the upstairs hall, the bathroom and both bedrooms. At first we figured it was some kind of low voltage lighting system but it didn't make any sense. The picture below shows these grooves if you click on it to enlarge the image. This is in fact the bedroom floor which was sanded over the weekend. The side channels run to the windows. That ball of wire in the foreground is some of the wire removed from this floor. I have many scattered about the house!

When I stripped the paint from the exterior doors I found brass closet switches inserted at the base of the frames below the lowest hinge and noticed that the grooves in each room lead to the doors and windows. Unfortunately there are no patent #s on these things so I can't get any manufacturing information.

When I stripped the paint from the exterior doors I found brass closet switches inserted at the base of the frames below the lowest hinge and noticed that the grooves in each room lead to the doors and windows. Unfortunately there are no patent #s on these things so I can't get any manufacturing information.

When the windows were restored I noticed a pair of brass plates on the left side of each sash that would touch any time a window was opened. (See picture below.) There were also channels leading to them with cloth covered copper wire embedded into the grooves that ran down through a small hole in the wood at the sill.
A hole would appear in the baseboard below this or in the floor and grooves would emerge leading off in the direction of the nearest window or door. A little poking around when stripping the floors and soon I was pulling up copper wire out of the grooves. Some sections were aleady missing, so the system must have failed long ago.
I have no clue WHEN this was installed. The evidence suggests that it is OLD. As in 1887-1890 when the house was modified. The molding over the channels in the window frames was held up with old square head nails and some of it had never been removed. Some research indicates that the first alarm systems were put in buildings in the 1850s. The wires of our system most likely terminated at a box that would light up if a window or door was left open. We know that the Volkenand family was having trouble with the neighbors "breaking in" during a time when the house was vacant and while it was being remodelled. They were looking for "treasure". The neighbors were in fact the benefactors of the former occupants estate (his daughters) and rumor has it that some stocks and cash was never recovered.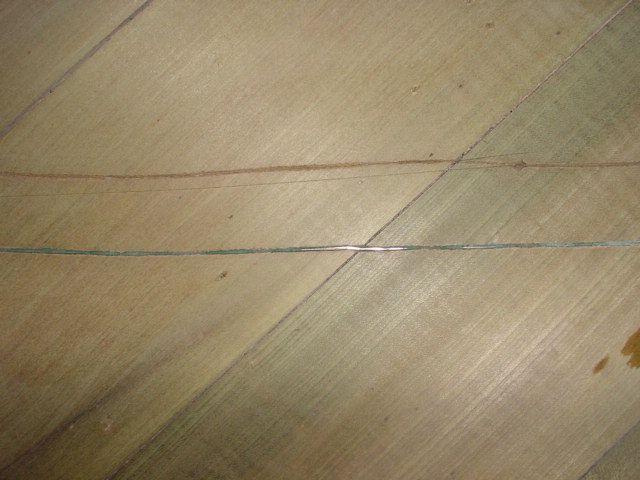
No one I have spoken to has ever seen anything like it before. The only hassle with it is that after sanding the floors some of the copper wire shines through (like in the picture above) and I have to pull the wire up and fill the groove with colored putty so that it doesn't appear as a distinct black line across the floor when it is finished. Most of the grooves will be covered by rugs, just like they were originally.
I am tempted to rig up some of the door swtches to a low voltage light or even a bell but I will do the modern thing and run the wires under the floor. Ooooh, I could have some fun with this at Halloween in a couple of years when Elizabeth is older! Every time the door opens I could have one of those haunting laughs or screams go off. Ooooh, ooooh oooooh, I can start planning now!
Chủ Nhật, 16 tháng 10, 2005
The Bedroom Now.
The bedroom has been painted and the floors have been sanded. I just have some putty work to do on some divits in the floor and I have some channels to fill from the antiquated alarm system (which I will describe in a later post) before I apply clear shellac. This floor is unique in that one half of the room is a dark wood (the 1845 part) and the bay section addition is pine from 1887. I am not going to try to stain this floor since any attempt to color the wood would be obvious. The best solution is to make the floor look as natural as possible. Did you know that the cost for a gallon of shellac has gone up $10.00 in the last 12 months!
Here is a before photo from 2001 when we bought the house. Note the wood-look vinyl on the floor and if I recall, this room had no light fixtures or wiring for any.
Here is a before photo from 2001 when we bought the house. Note the wood-look vinyl on the floor and if I recall, this room had no light fixtures or wiring for any.
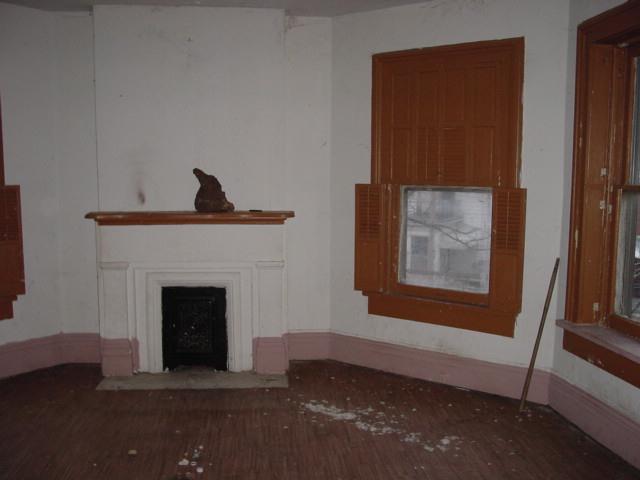
And here is the room today! Do you notice any change?

That's right! The floor no longer smells like cat piss!
Thứ Tư, 12 tháng 10, 2005
"To pee or Not to pee"
I was delivering something to one of my neighbors this week and noticed that their porch was littered with moth balls. The smell was quite obvious and smacks you in the face when you step on the porch. There were moth balls to the left of me, moth balls to the right of me and moth balls in front of me as into the shade of the porch I stepped (lines lifted from Tennyson's "Charge of the Light Brigade" in case they sound familiar.)
Turns out that they are supposed to keep the stray cats from pee-ing on their porch. I don't know which smell is worse......
Turns out that they are supposed to keep the stray cats from pee-ing on their porch. I don't know which smell is worse......
Thứ Sáu, 7 tháng 10, 2005
Primed and Ready!
The bedroom is primed and ready to be painted! Then I can sand the floors!
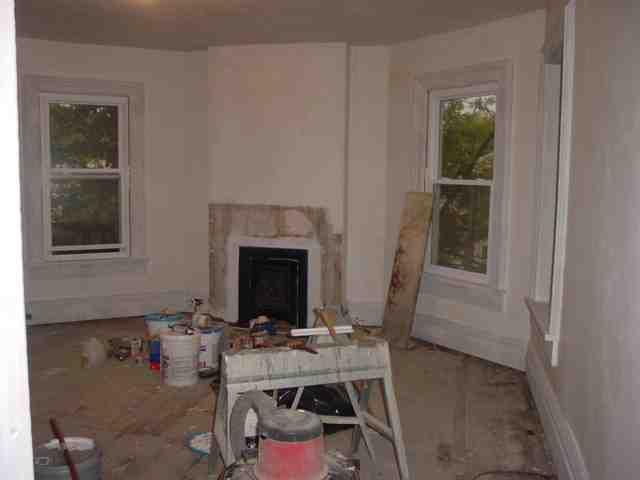
We already bought the paint! It is slightly darker than this picture due to the flash going off.
Paint is American Tradition National Trust, colors are from left to right, "Cliveden Sandstone" for the ceiling, "La Fonda Cactus" for the bay wall section and "Outlands Velvet Night" for the remaining walls. All I can say is it makes a bold statement. Oh, the woodwork will be gloss white of course.
The "Outlands Velvet Night" will also be used on the ceiling of the living room and dining room. I have already painted around the light fixtures to get an idea of how it will look!
Đăng ký:
Bài đăng (Atom)